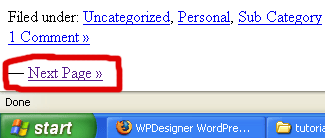
At the bottom of most WordPress blogs, there’s a Next Page or Previous Page link. You call for those links by using the posts_nav_link() function of the WordPress template system. In this lesson, there’s only one step!
Do I really have to tell you to open Xampp Control again, theme folder, browser, and index.php file again?
Step 1: (and only step)
Add the following codes between <?php endwhile; ?> and <?php else : ?>
<div class=”navigation”>
<?php posts_nav_link(); ?>
</div>

Notice the spacing in the screen-shot. I always use tab spacing for the organization.
<div class=”navigation”> – start an invisible box named navigation to wrap around your Next and Previous links area.
<?php – start PHP
posts_nav_link() – call for the Next and Previous links.
; – stop calling for them.
?> – end PHP
</div> – close the invisible box named navigation.
Here’s what it looks like:

Save index.php, then refresh your browser to see your own Next or Previous link. By default, if you don’t have more than ten posts, nothing will appear. If you don’t have more than ten posts, but still would like to see it, login into the administration panel, select Options > Reading, then set it to one less than the amount of posts that you have. For example, if you have six posts, set it to five.
How to customize posts_nav_link():
Just like some of the functions in the postmetadata lesson, you can give this function three sets of… anything that you want to be displayed in between, before, and after the Next and Previous links. It looks like this:
<?php posts_nav_link(’in between’,’before’,’after’); ?>
The first set of single quotes is for holding anything that you want to appear between the Next and Previous links. The second set of single quotes is for holding anything you want to come before it. The third set is for holding anything that comes after it.
Here’s an example of a customized posts_nav_link():

Follow this WordPress Theme Tutorial Series from the beginning.