The best way to learn CSS is to dive right in. Unlike XHTML and PHP, you don’t need to touch the core files of your template. You also don’t need to understand any basic concept. Just dive in. Trial and error is the way to go.
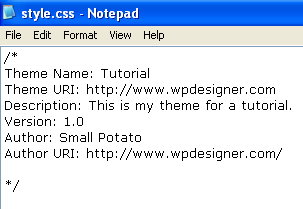
Before we start, you should already have some information in the style.css file. Let’s find out what that block of information means right now.

- First line is the theme’s name, which is self-explanatory.
- Second is the location of where your theme is available. If you’re creating a theme for yourself, not for public use, don’t worry about it.
- Third line is theme’s description.
- Fourth is version number, which is important, especially when you release updated versions of your theme for public use.
- Fifth and sixth is your name and homepage.
The /* and */ signs wrapping around your theme’s information is for preventing the theme’s information from affecting the rest of the page. It’s CSS commenting. While typing CSS codes to style your web page, you might want to add comments here and there to keep track of things. But, you don’t want your comments to affect the codes so you use the /* and */ signs to make your comments invisible.
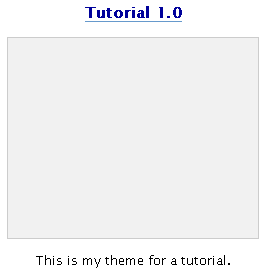
Here’s the processed theme information:

Step 1:
- Open Xampp Control, theme folder, a Firefox browser, an Internet Explorer browser, and the style.css.
- Point both browsers to http://localhost/wordpress
Here’s where you really need both Firefox and Internet Explorer to test your theme. Different systems interpret CSS codes differently. It’s best to test your theme in as many browsers and in as many operating systems as possible (Safari, Opera, Linux, Netscape, etc). If you’re lazy like me, test your themes in only Firefox and Internet Explorer.
(Notice: You don’t need to open index.php in Notepad, in this lesson. If you can’t already open the style.css with Notepad, right click on your file, select Properties, click Change, and select Notepad.)
Step 2:
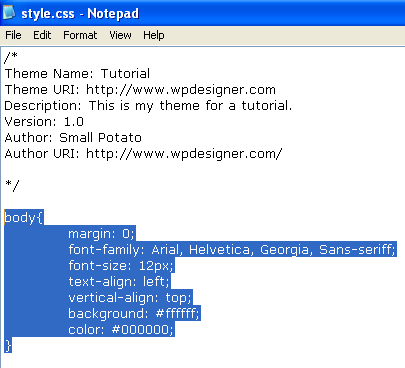
Type the following codes in the style.css file:
body{
margin: 0;
font-family: Arial, Helvetica, Georgia, Sans-serif;
font-size: 12px;
text-align: left;
vertical-align: top;
background: #ffffff;
color: #000000;
}
Just like working with XHTML or PHP, add tab spacing for the organization:

Save your style.css file, refresh both Firefox and Internet Explorer browsers to see the change. (You’ll be working with two browsers from now on.)
Treat body{ } as a tag and everything in between as attributes and values, just like you did with XHTML. { is open. } is close. Within the { and }, the colon means start and semicolon means stop. (I use the terms tags, attributes, and values when referring to XHTML, PHP, and CSS to keep it simple. In reality, PHP and CSS have different terms for their codes. For example: parameters, selector, and property.)
Before we move on, there’s a reason why you used the body{ } (CSS selector) and that’s because you’re working on styling the most basic (or overall) part of the web page, the <body> tag. You don’t style the <header> tag because there’s nothing to style. Everything that shows up on your web page sits in within the <body> and </body> tags.
However, later on, you will style the DIV box with the ID named header.
Further explanations:
margin: 0; gets rid of the default margin spacing of the body tag. If you wanted a margin or bigger margin, change the 0 to 10px, 20px, or etcetera. PX means pixels. Each pixel is a dot on your computer screen. When your margin is a 0, there’s no need to follow it with px.
In the image below, the red highlighted space is the default margin spacing applied to the body tag.

After styling it margin: 0;, here’s the same page without the margins:

font-family: Arial, Helvetica, Georgia, Sans-serif; selects which font to use for your web page or website. The fonts following the first one, which is Arial in this case, are alternates. If your users don’t have the Arial font installed on their computers, the style.css file looks for Helvetica, then Georgia, and then Sans-serif. You can find your list of fonts in the Fonts folder under My Computer > Hard Disk > Windows
font-size: 12px; is self-explanatory. Change it to a smaller or bigger number to see the change.
text-align: left; aligns your text to the left. Change it to text-align: right; to see the difference.
vertical-align: top; makes sure everything starts from the top. If you middle or bottom align the body tag, everything will be pushed down.
background: #ffffff; means white background. #ffffff is the hex code for white. #000000 is the hex codes for black.
color: #000000; means your text color will be black.
If you want to move ahead or learn CSS on your own, the best place to start at is w3schools.com
Follow this WordPress Theme Tutorial Series from the beginning.