If you haven’t already, follow my WordPress theme tutorial series from the beginning. If you don’t, good luck. Yesterday, I showed you how to turn on Xampp Control, install your theme, and introduced you to PHP. Today, we’ll continue with PHP and learn how to call for your site’s or blog’s title.
Remember, type every code. DO NOT copy and paste the codes that I give you. The whole point is to get you to remember what you learn.
Step 1:
Turn on Xampp Control. Next, open your theme’s folder at xampp/htdocs/wordpress/wp-content/themes/tutorial. You should see the two files you created yesterday: index.php and style.css.

Step 2
– Open a new browser window. Go to http://localhost/wordpress. You should see a blank page because you installed your empty theme yesterday.
– Go back to your theme’s folder and open the index.php file in notepad. To do that, right click on index.php, select Properties, click Change, find Notepad or the text editor you’re using, select Notepad and press OK. After the change, double-click on the index.php file.
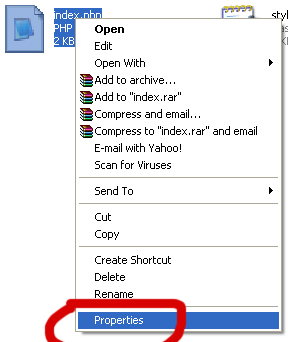
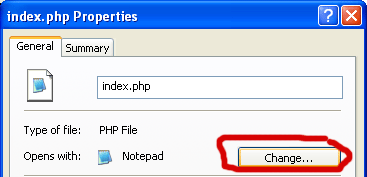
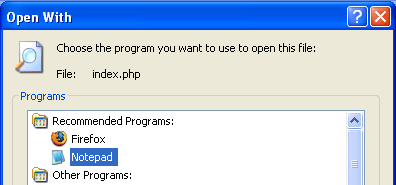
So far, you opened your themes folder, browser, and index.php file (using notepad).
![]()
Step 3:
You should be looking at your index.php file in Notepad. Type:
<?php bloginfo(’name’); ?> in between the <body> and </body> tags. Now save it.

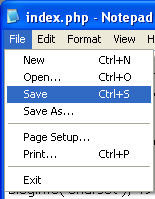
Go back to your browser, refresh it. You should see your blog’s title. My blog’s title is Demo Theme Development.
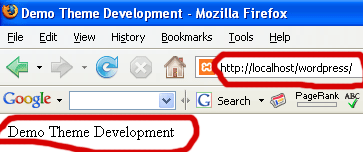
What just happened?
You added one line of PHP codes to your index.php within the body area of your web page. That one line called for your blog’s information, hence, bloginfo(). Specifically, it called for the name of your blog. The name that you have as Weblog Title on your Options page.
<?php – start PHP
bloginfo(’name’) – call for blog’s information, specifically blog’s title.
; – stop calling for blog’s information
?> – end PHP
Each time you add or change anything in your index.php file, save, then refresh your page to see the change.
Step 4:
To turn your blog’s title into a text link. It requires an XHTML tag. Go back to your index.php file.
Add <a href=”#”> and </a> to the same line. Your new line of codes should be:
<a href=”#”><?php bloginfo(’name’); ?></a>
Go back to the browser, refresh and you should see your title turned into a link.
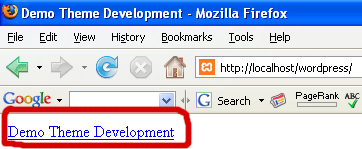
Now, it’s a link, but it’s a link that points to nowhere. Since it is your weblog’s title, you want to make it link to your front page. To do that, type:
<?php bloginfo(’url’); ?> in between the quotes of href=
Save it, now you have:
<a href=”<?php bloginfo(’url’); ?>”><?php bloginfo(’name’); ?></a>
Go back to the browser and refresh. When you hover on the link now, the status bar should display http://localhost/wordpress

When you click on it that link now, it sends you to your front page. You’ll be looking at the same page, but whether you have # or http://localhost/wordpress as your link’s address is a huge difference. You will see the point to this in the coming lessons.
What just happened?
You turned your website’s title into a link and pointed the link to your front page or blog’s home page.
bloginfo(’url’) – calls for your blog’s information, specifically the address or URL of the front page
<a> – is an XHTML tag for opening a link
</a> – is the closing tag for a link. Otherwise, your web page will not know where to end the link and the rest of your page will be one big link. Remember part of rule #1? Close everything you open.
href=”” – is short for hypertext value. Whatever’s in between the quotation marks of href=”” is the value
In words, the codes:
<a href=”<?php bloginfo(’url’); ?>”><?php bloginfo(’name’); ?></a>
means: I’m starting a link. The value of my link is my blog’s URL; I’m using the PHP function bloginfo(’url’) to call for the address/URL. The name of the link is my blog’s title; I’m using the PHP function bloginfo(’name’) to call for my blog’s title. Close my link.
I introduced XHTML to you today so I’ll end this lesson here. Don’t burn yourself out.
Follow this WordPress Theme Tutorial Series from the beginning.